Monday, August 4, 2014

Catching Up Part 4: Living at the Foundry

At one point in recent history, foundries were scaling back on the size of waxes that went into the shell room. It was explained to me that there were too many insurance claims being generated from the sheer brute strength it involved to manually lift the sprued waxes in and out of the sand and slurry tanks. Keeping that in mind, I assembled what waxes I knew could be cast in once piece while still in Virginia and would assemble the rest, if needed, under the direction of the foundry manager. I didn't want to rupture any discs or see any claims filed on my behalf.

As it turned out, the day I arrived at the foundry I was told to go ahead and finish assembling ALL OF HER! Yikes! That's a lot of work. The foundry gave me my own room to work in and I got busy turning open-faced panels into castable tubes.


The urn in two halves, ready to be put together.

 
 After the first few days it became apparent that I would be there for a long, long time and was literally given the keys to the kingdom. I still feel honored by the amount of trust that was bestowed upon me.

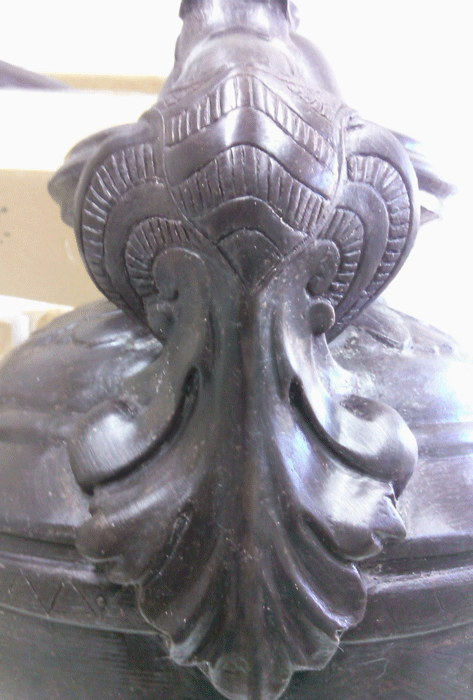
Welded together in wax, the urn gets the final detailing.

I was usually there from early in the morning until late into the evening, even working weekends to make sure it was all ready for the next crucial step. Coffee was my friend.
Detailing the urn.

 
As I only have two hands, at times I had to get creative: here rubber bands
hold her legs together so that I could weld with the soldering iron.

People often ask, "Is it male or female?" Well, I've spent a lot
of time peeking up that dress and I can tell you one thing for certain:
 I'LL NEVER TELL.

All in all, it was a wax marathon. I was so submerged by the end that when they started taking pieces from me to go into the next department I realized that I was having a hard time letting go. Even though I knew that she was going to very capable hands I was still emotional for a day or two. I had been working on her for over a year straight and had become very attached. The foundry manager finally came in and gently said, "It's time, Ken. She's beautiful. Go home and rest for a few days." And so I did.

The final fit up in wax. I was a very proud papa!

Catching Up Part 3: Road Trip and Arrival at the Foundry!

Since I lived in Colorado for many years I would make the drive occasionally to Virginia and back again for vacations and holidays with friends. It's a very long drive, a little over 1,600 miles each way and boredom can set in quickly. Fortunately, the van had a great sound system (thanks Enterprise!) and I had a lot of tunes to play.

I set off bright and early Monday morning, June 9th, with my suitcase and tools packed and a van loaded with waxes, nervous but excited. That line from the movie The Blues Brothers kept playing through my head on repeat: "We're on a mission from God." It certainly did feel that way for most of the trip.

Not pictured: my white knuckles.

The weather was horrible for most of the second day of driving. Missouri was black and dismal and the van was renamed "Moby" that day as it felt like I was navigating a great white whale. After a few phone calls from concerned friends that had been kind enough to monitor the forecast for me, I finally emerged into the beautiful puffy white clouds of the great American plains.

Wind farms! Too cool!

I made it to Manhattan, Kansas by the end of the second night on the road and was now facing only 600 miles left to go! Piece of cake. I had mastered Moby by this time and was oddly referring to myself in the third person only as "Ahab". Funny how too much time on the Kansas plains can quickly lead to madness.

Another long day of driving and I was finally pulling into the parking lot of Madd Castings in Berthoud, CO. The Waterbearer had made it!

Behind this door magical things await.

Catching Up Part 2: Wax Casting and Chasing


Once the rubber molds were completed I still needed to make plaster "mother" molds for them all. To best explain that, think of the soft flexibility of the rubber; it will need to be supported to cast waxes in the proper shape. I didn't dare take my camera into the studio when the plaster was flying so have no pics of that stage to share, unfortunately. I think I used roughly 600 lbs of plaster to finish the molds!

The wax casting process is basically roto-casting by hand the rubber/plaster molds with varying degrees of casting wax until the proper thickness is achieved. I started developing my own in-house proprietary blend of wax many years ago to withstand the shipping distance to Colorado where the foundry is. It's four different waxes melted together at 300 degrees and has just enough firmness to capture the most minute detail yet is springy enough that it won't shatter during travel. This seemed the perfect blend to use for the Waterbearer.

A ten quart and an eighteen quart electric roaster serve as my wax pots.

 
After the waxes are cast in the rubber/plaster molds, they still need to be cleaned up before they go to the foundry or every defect (seam lines, bubbles, etc.) would be captured in bronze. I use various metal tools, a soldering iron, a digital micromatic wax pen and lots of polishing pads and lighter fluid to get the beautiful finish on the waxes that I strive for. It's a very detail oriented part of the process and is generally referred to as "wax chasing".
The body parts are piling up!
 

At work on her head.
Digital calipers came heavily into play for many parts of this project but were used exhaustively on the base and feet. When the original zinc Waterbearer fell apart the base was heaved and ripped from the force and there was a two to three inch gap between the parts. I carefully measured the one good side I had to work from and, using the calipers, replicated the missing and mangled areas to match in wax. It makes me tired just thinking about it.

An insane amount of time was spent on the feet and base.

After months of work (the last weeks alone I was working sixteen hour days to stay on schedule), a final check is made and then it was time to start carefully packing her up!

(I hope she's not allergic to peanuts!)

The van (thanks, Enterprise!) all loaded with waxes the night before my departure.

The morning of departure for Colorado: I'm tired but determined.

Coming up next, the Waterbearer and I make the long drive West!

Catching Up Part 1: Mold-making

With the flurry of activity and craziness leading up to my departure for Colorado I never had a spare minute to sit down and do a proper update here and for that I apologize.

I am finally back in the office today and have nearly 1,000 photos and videos to go through. I will pick a few of the best that illustrate the process and share them over several updates.

The shims and interlocking keys have been added so that
everything will line up when the molds are finished
I used a soft urethane rubber to make all of the molds on this project. Since the project is a "one off", meaning that we would be casting only one, the rubber I chose does not have a long shelf life and will eventually revert back to liquid in 3 - 5 years.

Mold keys are held in place with sewing pins so they don't shift as they set up.

The rubber is built up in many layers to a thickness of approximately 1/4".

Multiple pieces in various stages of molding.
 

Mold-making is tricky business and as I've grown older, one of my least favorite aspects of this line of work. There are so many things to consider when making molds that it can become overwhelming at times: thickness, undercuts, pourability, etc. It's all a bit nerve-racking and if I miscalculate one little thing it can have a domino effect and lead to horrible results. The rubber comes in three parts: the base, the catalyst and the thixotropic or thickener. All parts must be carefully weighed on a triple beam balance to within the tenth of the gram; one miscalculation and that batch of rubber is ruined. All of the parts must then be mixed by hand for a pre-determined period of time. It's a terrible feeling when something goes wrong but I have learned to keep copious notes at each step so if something happens I can quickly isolate and correct the problem. I was very fortunate that all of the rubber molds for the Waterbearer came out perfectly.

Tuesday, April 15, 2014

Wow

I did a phone interview sometime late last year (I think it was the day before Thanksgiving) and eventually forgot all about it with the holidays and whatnot. I had no idea that the article, when published, would be so far reaching:

http://news.sudanvisiondaily.com/details.html?rsnpid=231075

Pretty neat.

I have been preparing a large update and have lots of photos to share (now that my antiquated camera is finally talking to Windows 8) so stay tuned! I'll do my best to have it up here by Sunday night.

Friday, February 14, 2014

Website Launch

I've been fine tuning this for a while now but I think it's time to share. Please take a moment and check out my brand spanking new website; hopefully it's easy to navigate and there is enough content to keep you coming back for more. There is still a bit more tweaking to due but I've got molds to make! Thanks for looking and I hope you enjoy.


http://kenfaraoni.com/home.html

Tuesday, January 14, 2014

Finally back!

I'm finally back online after nearly three months of computer related woes. I've made a lot of progress since then and will be back to posting more often to catch everyone up to date. In the meantime, here's a recent article that resulted from an interview that I did before I gave my talk in Lynchburg last Thursday:

http://www.newsadvance.com/news/local/water-bearer-project-casts-new-light-on-historic-sculpture/article_4f380608-7bfa-11e3-89b5-001a4bcf6878.html#facebook-comments